Tip 1: How to make a fish dryer
You will need
- - board;
- - long nails;
- - large birdcage;
- - a piece of wire or a metal rod;
- - metal cage;
- - timber;
- - nails;
- - gauze, tulle or insect net;
- - carpentry tool.
Instruction
The simplest fish dryer is a wide board with long nails driven into it. The nails pass through the board and are bent with hooks. So that the dryer can be hung on the balcony, make a couple of loops around the edges. Such a dryer is made very quickly, but it has a couple of significant drawbacks. You can use it only in the loggia, where the windows are covered with insect nets, otherwise all the fish will be infested with flies. You need to hang the dryer at such a height that the cat could not reach it.
A small dryer can be made from a metal cage. Actually, in this case, you don’t even need to do anything, just find a piece of thick wire and put a fish on it. Place the wire in the cage so that the fish does not touch the walls. Clamp the ends of the wire into the grid cells. Fish can also be dried on hooks attached to the top rim of the cage. Hang the cage and cover it with gauze or tulle. If there is a cat in the house, it is better to close the dryer with a wide board on top so that the furry fish lover cannot reach the gauze.
An excellent dryer will turn out from a large birdcage. It is made in exactly the same way as from a cage, with the only difference being that a sufficiently large rectangular cage may not be hung. Cut a few pieces of wire, string fish on them. Attach the wire to the bars of the cage. Cover the top of the dryer with a transparent, breathable cloth.
To make a stationary dryer, you will need a frame, about the same as for an aquarium. The frame can be welded or wooden. Welded is better to order. You can make your own wooden one. Knock together two identical frames for the floor and ceiling. The size of the dryer depends on the amount of fish you are going to process. Instead of the bottom frame, you can put a board, instead of the top one - a piece of thick plywood.
Connect the floor and ceiling with four identical bars or wide slats. At the same distance from the floor on opposite sides, pin two more slats to hang the wire. Cut off several pieces of thick wire. String the fish, lay the wire on the cross rails so that the fish do not touch each other. Cover the structure with a light cloth.
Fish is a perishable product. But if, after a successful fishing catch, there are more fish in the cage than usual, then it is worth trying to sell it. Thus, the fish will not be lost, and you can get some money from selling it.
Instruction
Offer to buy fresh fish to your neighbors on the porch. Hang out in the yards where you live, announcements that you are selling urgently fresh river or sea fish. Over time, you will have phones of regular buyers of fresh catch, with which you will be able to sell the surplus of caught fish.
Place a free classified ad for the sale of fresh fish on the Internet on websites and web bulletin boards. In order for such an ad to be published, you need to register on the site and fill out the ad forms offered by the resource.
Apply with an offer to buy fish from you in wholesale bases specializing in the sale of frozen and fresh products. It is better if it is a fish base. Perhaps, as an exception, you will receive fresh quality fish at a reasonable price at such a wholesale point.
If you are going to often sell fresh fish, register an individual entrepreneur (PE), purchase a license, a certificate from a sanitary and epidemiological station and sell products on your own in the market or with the involvement of a seller.
Sometimes fishermen sell the surplus of the caught fish without going far from the place of the catch, for example, not very successful fishermen who this time had no luck with fishing, but would like to bring home the fish.
You can dry the caught fish yourself in the summer in the sun, in winter - in a warm, ventilated room, in dryers. Such a product is more likely to be sold, it is stored longer and it is easier to find dried fish lovers. Dried, dried, salted fish is also sold at better prices than live or frozen. You can resort to this method of preserving fish if you have a lot of fresh product in stock, but for some reason you did not have time or could not sell it.
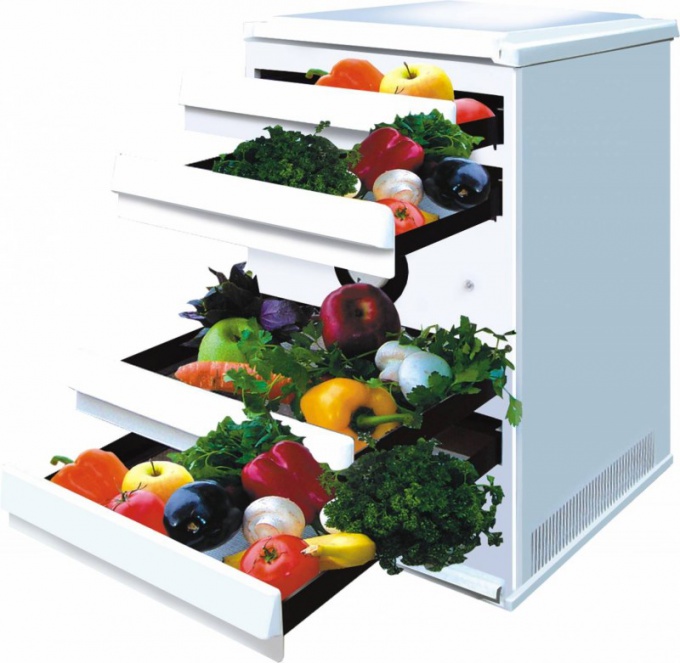
Drying fruits, vegetables, mushrooms and berries is such a hassle. For example, insects can spoil homemade blanks. In order not to face a disappointing result, it is better to make a homemade dryer: the workpieces will be reliably protected in it.
You will need
- - plywood sheet;
- - hacksaw;
- - roulette;
- - pencil;
- - sandpaper;
- - hammer;
- - nails;
- - grid;
- - wire;
- - fan;
- - electric motor;
- - polymer film;
- - scissors or a knife.
Instruction
Put together a plywood box (its dimensions: 600x800x400 millimeters). But first, mark up the plywood sheet. Then cut out the individual elements of the future dryer with a hacksaw (cut strictly along the marked lines).
Using a wire, fasten an electric motor with a fan to the mesh bottom. The installed motor must be compact and run on 220 V. By the way, the electric motor can be taken from an old player.
Following this, it is necessary to collect trays on which fruits, vegetables, mushrooms and berries will be laid out. To do this, you will need a polymer mesh and wooden slats with a section of 30x45x50 millimeters. Cut the slats to the required dimensions (should be cut at an angle of 45 degrees) and clean the burrs with sandpaper.
Along the perimeter of each tray, select a quarter (that is, it is obtained from both sides of the rail). This must be done to tightly install the trays on top of each other.
On wooden slats, mark future grooves with a pencil. Using a planer or chisel, as well as a hammer, sample the groove. After that, grind the sample plane using sandpaper.
Hammer the frame of the tray with nails. Then stretch the protective polymer mesh and secure it to the tray with staples and a stapler. Cut off the excess mesh edges with a sharp knife or scissors.
note
Do not leave fruits, berries, vegetables or mushrooms in the drying chamber for a long time. Three or four days after drying the gifts of nature, expose them to the sun or dry them in the oven.
Useful advice
If there is no particular desire to make a drying chamber with your own hands, you can buy a dryer.
Sources:
- How to make a fruit dryer with your own hands in 2017
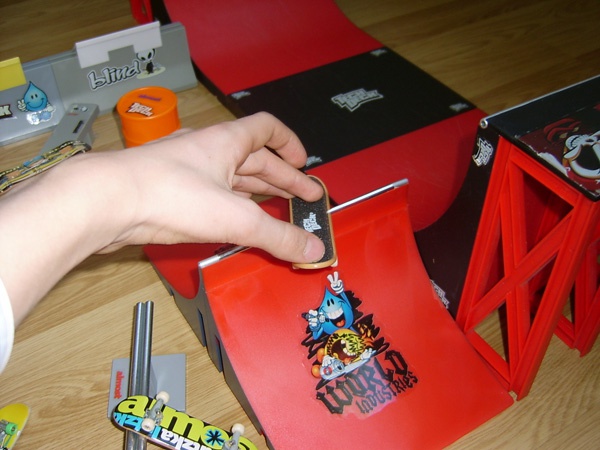
Fingerboarding is a new popular entertainment for young people. One of the most important components of this type of hobby is the ramp. If you haven't got one yet, it's time to create a park at home. On the ramp you can do many different high and beautiful tricks.
You will need
- - fiberboard sheet,
- - wooden blocks,
- - corners for fastening,
- - nails,
- - instruments,
- - a cylindrical object
- - rope,
- - heavy object (brick).
Instruction
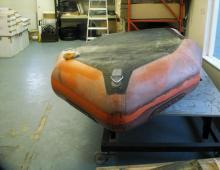
Take a cylindrical object, for example, a three-liter jar. Press the sheet against the jar, folding it. Bend the sheet until you get a 90 degree angle. Now the ramp has already begun to take shape.
Put ramp bent ends to the floor. To prevent the ramp from arching, put a heavy object on top, such as a brick. You can also pin ramp on the clothes dryer. In this position, the ramp should dry for about 12 hours.
Make supports. Take wooden blocks and fastening corners. Decide what ramp height you need, measure it. Saw off the bars of the desired size, there should be 4 of them. We advise you to make the height of the supports 0.5 cm below what you measured. This is necessary in order to give a certain tension.
Create the surfaces you are going to drive off ramp. Saw out pieces of the bar 10-11 cm long. Saw out a sheet of fiberboard, its length should match the width of the ramp, and the width of the sheet should match the length of the bar.
Pin the canvas to the supports if it is already dry. If the ramp is big, call your friends for help. nail ramp to the supports from the top side only.
Start collecting what we prepared in the previous step. Pin the fiberboard to the bars. Nail the resulting shelf to the ramp.