Equipping a headscarf for winter fishing. What is a fishing scarf and how to use it? Coloring the plastic nod
Among fishermen there are still many fans of completely non-sporting gear: scarves, screens, paths and other types of nets remain consistently popular, including as additional gear or for. Trophies caught with such gear are quite rare, but its compactness makes the scarf quite common.
Features of the tackle
The fishing headscarf has a simple design: it is a net that, when unfolded, has a triangular shape, which is ensured by a metal rod at the base of the triangle. It not only plays the role of a sinker, sinking the tackle to the bottom, but also holds the net in a straightened state. This point allows you to use the scarf, including for ice fishing in winter.
When folded, the scarf is quite compact and easily fits into a hole of even a relatively small diameter.
Important! This device for catching fish is also considered a net, which means it is classified as poaching gear. And although you won’t catch much with a scarf, a meeting with the fish inspectorate, especially during the spawning period, threatens with considerable fines.
Fishing in spring
A fishing scarf is a fairly effective tackle in the open water season, especially in cases where you need to catch live bait, or just relatively quickly catch fish that are not trophy sizes, for example, for fish soup, and the fisherman is quite familiar with the characteristics of a particular body of water.
When using such gear, it is important to imagine where it will be most effective. If the net is far from the paths along which fish usually move, then you shouldn’t count on a catch.

An option for the open water season - a float holds the tackle in the required position.
When installing a scarf, you need to have a fairly clear idea of the most likely places where fish will accumulate in a particular body of water. Most likely in the spring it will be the growth line of reeds, riverbed edges, snags; installing scarves around a tree fallen into the river may also be quite effective. Sometimes it makes sense to make a little noise, driving fish out of secluded hiding places - this technique is used both for screens and televisions, and for scarves.
Features of ice fishing
Thanks to its specific shape, the scarf, when folded, easily fits into the hole, and after all the tackle is under the ice, it straightens out without any problems. The net is left attached to a stick placed across the hole for a certain time. This principle of fishing allows you to install several kerchiefs at once (in some cases, the count can be dozens of nets), and periodically check them for the presence of a catch.
Important! If the main goal is to catch live bait, then you should not immediately pull out the entire scarf from the hole. First, you should free the fish that are entangled in the upper parts of the net - this way, the rest of the bait will not have time to freeze in the cold.
As promising places for fishing, you should pay attention to the growth line of the reeds. Immediately after freeze-up, fish often continue to stand in such places (especially perch and pike). It is also worth trying to fish near snags and trees fallen into the water, at the entrances and exits of holes. The better the angler is familiar with the features of the bottom topography, the higher the likelihood of success when fishing with a scarf.
The most effective fishing with a scarf will be immediately after freeze-up, since at this time not all the fish have gone to the wintering pits and can still move quite actively around the reservoir. When the fish is not moving, the scarf is practically useless.
Application of bait
A scarf is a fairly small net, which means that some additional factor is needed to attract fish to the place where the net is installed. Along with this gear, you almost always have to use one or another version of bait mixtures. It is important to take into account that the composition of these mixtures will differ significantly depending on the season.
In open water, a light mixture with a pronounced aroma of spices will work well (this smell is attractive to most types of fish). In this case, you should simultaneously use both highly moistened bait balls, which will work when they fall to the bottom, and under-moistened ones, which will create a trail in the water column that attracts fish. In order to increase the effectiveness of bait, animal components of maggots, red dung worms or food bloodworms can be added to its composition.
Important! You can use the technique of feeder athletes: cut the red worm or maggots with scissors, and only then add it to the bait. This smell can attract the attention of even the most passive fish.
Winter varieties are usually less nutritious, their aroma is much weaker, and the color is usually dark. A strong spicy smell or bright colors in winter can, on the contrary, scare away fish from the place where the scarf is installed. A winter version can also be made from summer bait simply by adding a sufficient amount of soil.
You should also pay attention to the method of delivery of bait. In winter, it is better to use special feeders that allow you to release bait directly to the bottom of the reservoir. In the summer, the feeding process is somewhat simpler - ordinary bait balls are quite enough.
How to make it yourself
Making a scarf for fishing with your own hands is quite simple; the process does not require the purchase of any specific materials or tools and is usually made from what is available. For this gear you will need a net, a metal rod with a diameter of at least 5 millimeters, as well as a fairly thick fishing line (at least 0.4 millimeters in diameter) or even a thick nylon thread and a relatively small foam float that will hold the upper edge of the scarf in the desired position. The rod can be shortened to the required length with an angle grinder, but if you don’t have one at hand, you can do this kind of work using a chisel and hammer. The manufacturing algorithm is quite simple:
- The net should be spread out on a flat surface. In the case when the scarf is made from a fragment of another network, you need to cut the fabric of the required shape and size. If it already has the desired triangular shape, you can immediately move on to the next step.
- Using a thick fishing line or nylon thread, the web of the net is fixed to a metal rod (notches should be made on it first). And also this main thread should be passed through the cells of the side walls. If necessary (for example, if there is a strong current in the reservoir), several additional weights can be attached to the rod so that the tackle sinks faster. The main thing in this case is that there is no excess of one gusset in one direction; it is advisable to distribute the load evenly.
- On top, the threads or fishing line passing through the side walls must be secured to a ring, to which a rope will also be attached, with the help of which the scarf is immersed to the required depth. In the summer version of the gear, a foam float can also be added, which is necessary to maintain the net’s vertical position.

If you don’t want to bother making your own, a scarf can be purchased at most fishing stores.
Mesh size
This parameter directly affects what kind of fish you can catch with a scarf. The following options can be roughly distinguished:
- A double-walled version with cells of about 70 millimeters - suitable for serious fish like bream; there will definitely not be small things in the catch. Typically, such nets are made from fairly thick fishing line.
- Cells of 50–60 millimeters are suitable for white bream, more or less large silver bream and roach.
- The single-walled version with a 35 mm cell will perform well on perch, roach, and sabrefish.
- If you need small live bait, then the most suitable option is 20 millimeters or less. The fishing line used is of small diameter, and most often transparent, since fishing is supposed to be done at shallow depths.
Do-it-yourself network weaving
It is impossible to make a scarf for fishing without a net. You can use ready-made Chinese blanks, but often the quality of the fishing line from which such nets are made is extremely low. The lack of tensile strength is often compensated by a larger diameter, which makes the tackle more noticeable. Therefore, although relatively rare, fishermen can weave a net for a scarf themselves.
The main advantage of making it yourself is the ability to choose the fishing line yourself and its characteristics, from diameter and color to behavior at low temperatures (many cheap options “tann”: they lose flexibility and elasticity).
Sometimes braided cords are used as a material for making nets. Their main feature is minimal elongation and high breaking loads with a small diameter.
For manufacturing, you will need a special strip that will ensure the same size of the mesh cells of the network, and a shuttle on which a supply of fishing line or cord is stored; the shuttle is also used for knitting knots. It is important to take into account that it is possible to knit a net with large cells with a small shuttle, but, on the contrary, with small ones, it will not work: the shuttle simply will not pass through a cell that is smaller than it is in size.

The bar and shuttle for weaving nets have probably changed little over the past few thousand years.
The scarf is a relatively simple tackle both to manufacture and to use, which, however, extremely rarely brings trophy catches. It is most appropriate to use it for catching live bait.
It may also happen that you come across a large school of fish, but you won’t catch them, since you only have one fishing rod in your hands. And I really want to catch all these fish. This could only be done through networks. But in the waters of Russia, fishing with a net or similar inventions of fishermen, which include TV gear and a scarf, is considered poaching and is punishable by a fine, as well as for a negative impact on the environment. True, factories and enterprises that emit pollutants into the atmosphere or water sources that adversely affect nature are at risk of receiving this fine.
The “kerchief” tackle will come in handy only at the very end of autumn - at the beginning of winter, when the first ice appears on reservoirs. At this time, the fish continues to behave quite actively, gaining weight before the long winter. Most often, perch or roach are caught with this tackle. In the middle of mid-winter, the scarf becomes practically useless, and will only be needed closer to spring warming, when fish activity increases. Now you know how to catch a lot of fish, the scarf, unfortunately, is a prohibited option.
The fishing tackle of the scarf is very similar in its design and principle of operation to the tackle called “TV”, the only difference between them is the mesh fabric, which is triangular in shape for the scarf, and rectangular or square for the TV. Also, the float, naturally, is not a stick, but a cylinder made of foam plastic.
It’s easy to guess that the closer the fish is to the bottom of the reservoir, the more opportunities it has to get entangled in the scarf that tapers at the top. For this reason, “kerchiefs” are more often used on the eve of winter, when almost all the fish swim to the bottom.
In winter, many fishermen convert their “TVs” into hand-made “kerchiefs” for fishing, replacing a long float with a compact one and pulling the upper edge of the mesh together to make it easier to insert it into the hole.
comments powered by HyperComments
DIY winter nods for ice fishing
Let's figure out what winter nods are for, what types of nods there are and what are their differences, which nod to choose in a particular case, and of course - how to make a winter nod for your fishing rod and why you need to do it with your own hands, yourself.
Nods for winter fishing
Today, nods for winter fishing have a huge variety of designs and materials. The assortment of fishing stores includes plastic, metal nods, and nods made of composite materials. In addition, there is a conditional classification of nods by purpose: for trolling, nods for balancers, jig nods for reelless and other types of winter fishing.

In some cases, there is no point in making a nod for winter fishing on your own, as this requires time, skills and materials for manufacturing. Now, for 20 rubles, you can buy a ready-made nod for almost any fishing rod. The problem with ready-made nods from the store is that they are of little use for light jigs, and they still need to be modified.
The point of making a nod with your own hands is when you need a special nod for winter fishing - completely suitable for fishing with a specific bait (jigs, spoons or balancers).
Unlike guards or bite alarms, the main function of the nod is to guide winter bait, be it a jig, a balancer or a spinner. With the help of a nod, the angler monitors the bait's contact with the bottom, gives the bait the desired amplitude and frequency of oscillations, and registers the bite.
Types of nods according to materials of manufacture, design, and their purpose
As we said above, nods (or rather, their working part) are metal and plastic; products made from natural materials are less common. Nods made of different materials are suited to certain types of winter fishing to varying degrees. Now let's look at this in more detail.
Materials for making nods
 Material for nods
What are nods made of:
- Spring steel metal plates. A typical example is a clock spring or a tape measure. Suitable for trolling rods and heavy jigs. The advantage is indestructibility. Disadvantages: difficulty in processing during manufacturing, sometimes excessive roughness of the gear.
- Plastic plates. Dacron (thermoplastic, also known as: polyethylene glycol terephthalate, PET, PET, PETG, mylar) is suitable for production, which is taken from various plastic products - disposable PET containers, X-ray film, etc. Plastic is great for making any type of nod.
- Twisted spring. Very poorly suited for nods, but suitable for making gatehouses.
- Rubber nipple. Suitable for making simple nods. Now it is almost never used.
- Boar bristles. Suitable for making jig nods. An anachronism, boar bristles are almost never used now.
- Fishing line. Previously, in the absence of the necessary materials, thick fishing line was sometimes used to make nods. Forest nods are now almost never used.

What are the design nods:
- Classical. The working part of the nod (usually a plate) passes through the base, which is the holder of the nod on the winter fishing rod.
- Combined. This is a different kind of modernization of the classic nod, a combination of different materials.
- Complicated structures (most often these are not nods, but gatehouses).
The working part of plate plastic or metal nods can be simple, conical (trapezoidal, “swallow wing”) or double-conical. Double-taper means taper in two planes - not only in the width of the plate, but also in thickness. This is necessary so that the nod does not bend at only one point, but works along its entire length. We will talk about this as the material progresses.
Designs such as: crossbow nod, Shcherbakov balance bearing nod, etc. – all this applies more to guards and bite alarms. We'll talk about this briefly too.
Making nods and guards for winter fishing rods
Let's move on directly to how you can make various kinds of nods with your own hands.
 Making nods
Let's say right away - there is no point in making a nod that can be bought in a store, there is a point in making a nod only if the design of the nod you need is not on sale (Shcherbakov's guard, crossbow guard), or you need to make a nod that is most suitable for the weight of a particular bait, or some kind of special nod. Athletes and fishermen who are seriously interested in winter fishing mainly use homemade nods.
Nevertheless, let's move on to practice. In any case, this can be used to refine store nods.
Almost any nod consists of a form and a holder (clamp, connector). Separately, we will focus on the manufacture of the nod holder, with the help of which it is installed on the whip of a winter fishing rod. It will be below.
Metal nods from a plate

Metal plate nods are suitable for fishing rods equipped with a light spoon or balancer, as well as relatively large and medium-weight jigs.
The material can be a clock spring, a metal tape from an old tape measure, or any other available spring plate metal that suits our thickness.
Our task: cut off a strip of the length and width we need under the cone from the metal plate, give the nod a double taper, and fasten the winding ring.
 Conical metal nod "swallow wing"
DIY metal nod:
- We take a workpiece of the required length (6 – 10 cm);
- Using ordinary scissors or metal scissors, we cut a strip ~ 1-2 mm wide on one side (the working part of the nod) and up to 4 mm on the other - under the cone;
- Using sandpaper, remove sharp edges and burrs;
- Using sandpaper or a power tool, reduce the thickness of the nod plate from the tip side, giving the nod a double-taper;
- We solder or glue a light miniature ring made of thin stainless wire to the tip of the nod;
- Attach the nod to the holder.
The taper of the nod form in terms of thickness is necessary for better performance of the nod when oscillating (the nod bends not at one point, but along the entire length), but this is a rather complex and time-consuming operation, especially if it is done manually. In extreme cases, you can do without double taper.
Installing a final ring and intermediate rings on the nod makes the nod heavier and affects its operation, so you need to try to make these elements as light as possible. The end ring can be soldered or glued with reliable glue. Some people use a plastic ring that is secured through the bend of the tip of the nod and secured with a kebrik. All options have their advantages and disadvantages.
Sometimes, to give additional rigidity at the base, a twisted spring is installed in the holder, through which the nod itself passes.
Manufacturing process on video (as an example):
 Mylar nod
A lavsan nod can be used as a jig nod for a reelless jig, any light and ultra-light jigs, light spinners and balancers.
Plastic mylar nods are simpler and cheaper to manufacture. The problem is that commercially available nods are usually too rough for delicate gear. Most sports fishermen and some amateurs make them themselves and this is how they get the right nods.
To make a plastic nod (form), you will need Mylar film. You can “get” it in a fishing store or use plastic from PET containers. You should know that the material properties of different plastic glasses and bottles are very different from each other, so it is better to find high-quality lavsan. High-quality plastic straightens out at any kinks.
A plastic nod made of lavsan can be a simple cone, double-cone, or spring.
 A simple nod made of lavsan
- Using scissors or a stationery knife and a ruler, cut a plastic strip 6-10 cm long to a cone from 1.5 mm to 3.5 mm;
- On the thin side of the nod, using a thin needle, carefully punches a hole for the fishing line;
- We fix the nod strip in the holder and install it on the fishing rod.
Despite the fact that we cut the strip according to the cone, the nod may not work exactly as we need. Therefore, we hang the jig on the nod, look, and begin to modify it, giving the blank plate a taper in thickness.

Plastic is much easier to process than metal. You can grind the thickness of the plate into a cone using sandpaper, a razor blade, a scalpel, or a sharp ice drill knife. The main thing is not to overdo it when checking the deflection of the nod on the jig under which we make it.
You can see the process of making lavsan nods at the bottom of the article.
Spring nod
The spring design of the nod is somewhat more complicated - three plates of different lengths are already used here, one of which (the main one, the nod form) also serves as a tray.
 Spring nod
Here's roughly how it's done:
- We cut a strip of the required length along the cone, leaving a reserve at its base for forming a tray;
- Along the width of the main plate, we cut two more strips that will serve as springs;
- We form a tray on the first strip by bending the edges of the plates;
- We install two spring plates in the tray, the length of one of which is 2/3, and the other 1/2 of the main one;
- We fix the structure by securing the plates together with two PVC tubes;
- We place the spring structure into the nod holder.
The complexity of this design lies in the formation of a tray for the spring plates, but you can do without it by fixing the plates together with a large number of PVC tubes. In this case, we can cut triple plastic in one motion, and we will get strips of strictly the same width.
Coloring the plastic nod

The lavsan itself is a white material and, without coloring, blends in with its surroundings on the ice. Watching such a nod strains the eyes. This can be easily corrected by painting the tip of the nod.
This can be done using a permanent marker or ink from a ballpoint pen. In both cases, the color hardly wears off and does not affect the working qualities of the nod.

Balanced nod, bearing nod, Shcherbakov nod - a design that should inform the fisherman about a bite, without allowing the fish to feel the weight of the bait. When biting on the rise, the nod compensates for the weight of the bait - hence the name “balanced”. This has nothing to do with fishing with a balance beam, but is used by some anglers when catching cautious fish - bream, roach and crucian carp.
To make Shcherbakov's nod we will need:
- Micro bearing. It can be taken from an old unnecessary spinning or multiplier reel, or a failed computer hard drive;
- Thin but tough steel rod;
- Weight for balancer;
- Cambrics and glue.
Do-it-yourself balancing nod of the Shcherbakovs:
- We service the bearing and rod in the second third of its length;
- Solder the rod to the bearing;
- We place a weight with a hole on the short arm of the structure; if necessary, we use cambrics;
- We paint the weight in a bright color and attach a bright plastic or foam beacon to the tip of the long arm;
- We solder a line pass ring onto the long arm of the guard;
- Solder the passage ring to the top of the bearing.

Setting the balance nod:
- We attach the bearing to the pole of the winter fishing rod;
- We pass the fishing line through the rings and tie the jig;
- We lower the jig into the water and adjust the position of the nod by moving the weight at its end.
The Shcherbakov balance nod is so called because the idea of such a design was shown by the Shcherbakov brothers in their film “Winter Fishing”. You can watch it at exactly the right moment:
 Nod "Crossbow"
The “Crossbow” nod got its name due to its external resemblance to the weapon of the same name. It is used for passive fishing of peaceful fish and ensures smooth play. The crossbow nod is characterized by very high sensitivity to bites from cautious fish. In our opinion, the design is too complex and inconvenient.
We found a mention of this design in the old Soviet fishing encyclopedia, in which this type of guard is called a “nod of a complex design” working on the torsion principle (using not only the energy of the nod to compensate for the weight of the jig, but also the energy generated by the twisted rubber threads of the torsion bar).
To make a crossbow nod you will need: stainless steel wire with a diameter of 0.8 - 1.0 mm, aircraft model rubber, cambrics and tubes, a hard plastic guard, waterproof glue.
DIY nod crossbow:
- We form a frame of the gatehouse from wire with an arm length of 5-6 cm and a structure width of 6-7 cm;
- The ends of the wire structure are fixed in the middle of the whip of the winter fishing rod;
- On the frame of the “crossbow”, with a slight tension, an elastic band is installed, threaded into a transparent silicone tube with holes for the guard;
- A rigid guard is installed so that its end passes between two rubber bands;
- We stretch the line of the winter fishing rod through the rings on the pole and the guard, the bait is tied;
- The bait is lowered into the water and the tension of the fishing line and the position of the guard are adjusted by twisting the rubber bands.
When the tackle is set, the “Crossbow” guard ensures smooth play with the jig, and when biting, it does not allow the fish to immediately feel the weight of the jig, compensating for its weight with the work of the rubber.
Spring nod

A coiled spring nod is called a spring nod. The design is simple, reliable, but does not provide the necessary bait for the game. Suitable for fishing with spinners and balancers as a bite alarm and touching the bottom.
Making a spring nod:
- A bright beacon in the form of a ball is installed at the end of the required length of the spring;
- The spring is inserted into the guard holder;
- The line of the winter fishing rod is passed through the spring.
If the fishing line is passed through a spring, it is important that there are no various kinds of notches and burrs at its ends that can damage the fishing line.
A nod made of nipple rubber or silicone materials with similar properties, like a spring nod, is very simple in design and quite reliable.
In the simplest design, nothing else is needed except the nipple itself: the fishing line is threaded through it, and the nipple is put on the whip of the winter fishing rod. The fishing line slides between the nipple and the pole of the fishing rod not freely, but with force, so when reeling in and reeling in a large amount of fishing line, it is removed.
Of course, there are also designs with a holder:

Boar bristle or fishing line nod

Previously, in the absence of synthetic materials with the required properties, boar bristles were used to make sensitive nods. But it is still used to make various brushes, brushes, etc. products - this is like a hint for those who don’t know where to get boar bristles.
Making a nod from boar bristles:
- The end of the boar's bristle is bent into a loop, which is fixed with a bobbin tightly placed on the ends of this loop;
- The free end of the bristle is inserted into the nod holder;
- To prevent the bristle from accidentally flying out of the holder, its second end is also bent into a loop with a cambric;
- The holder is put on the whip of the fishing rod, the fishing line is passed through the hole in the holder and the loop at the tip of the bristles.
A nod made from thick fishing line is made in exactly the same way as from bristles.
Nod holders (connectors)
The holder is part of the nod structure, be it plastic or metal.
What can a nod holder be made from:
- From various PVC cambrics and silicone tubes;
- High-voltage automotive wires;
- Electrical stranded wires, double or triple insulated;
- A set of plastic and silicone tubes of different diameters from a fishing store.

The simplest holder is made without glue from just two cambrics, one of which is put on the whip of a winter fishing rod, and the fishing line is pulled into the other:
- A thin cambric for fishing line is placed inside a cambric suitable in diameter for the rod whip;
- A nod plate is inserted into the main cambric;
- All this is put together on the whip of a winter fishing rod.
 The simplest nod holder
A small cambric can be glued on top of the main one, or you can use a cambric from a two-core wire.
 Nod holder with cambric for fishing line
The casing from a high-voltage automotive wire is excellent for making a nod holder. It consists of two layers of insulation inside which a conductive wire passes.
 Automotive wire holder with double insulation
The process of making a holder from it looks like this:
- Carefully, with smooth edges, cut off a piece of wire 5 - 10 mm long;
- We remove the conductive wires;
- We push the layers of cambric insulation apart and place the finished nod plate between them;
- We pass the line after the plastic nod.
For the fishing line, you can provide a separate winding hole by gluing a thin cambric on top of the holder or passing it inside the holder along with the nod plate.
Two-core wires in double insulation - almost finished design of the nod holder:
 Nod holder made of two-core wire in double insulation
- Cut a piece of wire 5 - 10 mm long;
- We remove the inner insulation layer along with the conductive core from one part, and only the core from the other;
- We pass the nod plate through a hole with a small diameter;
- We put the nod on the rod whip through another hole.
As in the previous case, the fishing line can be passed along with the whip plate, and protection can be provided for it with the help of a very thin cambric.
How to properly thread the fishing line through the nod? Nods of different designs imply different ways of threading the fishing line through them.
Common scheme:

- We pass the line of the winter fishing rod coming from the reel along the whip and insert it into a special hole (ring, tube) of the nod holder;
- We pass the fishing line along the nod form through the intermediate rings (ring or holes);
- We insert the fishing line into the ring or hole at the tip of the nod form.
It should be taken into account that on the whip of a winter fishing rod and on the nod form, there may be intermediate rings to evenly distribute the load, but they may not be there. If there are intermediate rings, we pass the fishing line through them as well. The line should be located along the top of the nod form.
Correct nod
What should be the correct nod? It all depends on personal preference and lure playing style. For the same bait, you can use nods of different rigidity - straight and short or long hanging, and the effectiveness will depend only on the nature of the game. The correct nod is the one with which you can catch fish.

Homemade nods - video
Surely each of you has heard how, while fishing, an old grandfather (an experienced fisherman) tells the “greenies” about life and catching big fish. And this is not just like that, most likely he was asked about it, and such requests indicate a growing interest in winter fishing. But most often, your grandfather will only tell you how to fish, but you are unlikely to know how to choose an ice auger, jigs and a box for winter fishing. Of course, you can’t teach everything, but I would like to talk about choosing and buying a fishing box in this article.

A fishing box for winter fishing is an integral part of the things you need on the ice. My first “fishing winter” was without a box. And I realized from my own experience that you definitely need to buy it or make it yourself, since fishing becomes inconvenient, and moving around a body of water in search of fish is generally unbearable. Any angler who wants to enjoy fishing rather than suffer through it should have a box.
The box has quite a lot of functions. Its main task is to store all fishing rods, equipment, bait and groundbait. The secondary task is a container for fish, well, if you catch it, of course. And without a box, you will need to carry a stool or chair with you, but it can be easily replaced. So the third function is the role of sitting.
When choosing a fishing box for winter fishing, you need to pay attention to the following:
- The box should be very light. Sometimes fishermen are faced with situations where they need to walk several kilometers on ice to get to the fishing spot, and then it’s not entirely pleasant to carry the weight.
- It should fit everything you need. Based on what you need, you should choose the capacity.
- He must be practical. The ease of putting things in and taking them out of the drawer should be maximized.
- The box must be durable. You won't like it if you sit on it and it falls apart.
- Average price. Don't buy a box that is too cheap or too expensive. Give preference to the golden mean, and for those who do not want to buy, we recommend reading further - below there are step-by-step instructions for making a box at home.

Since I didn’t have my own box, I turned to my uncle for help and he kindly provided me with a homemade fishing box. I felt much better with him than without him. Yes, it was not a store-bought box with a bunch of compartments and convenient clasps, but something is better than nothing. My father, due to the lack of two boxes, wore a backpack for fish and carried around with a folding chair. It was quite inconvenient and constantly angered him.
Homemade boxes are often seen not only among middle-class fishermen, but also among the elite. It’s a little surprising when they take out a winter echo sounder costing about 20,000 rubles from a wooden box knocked together with a dozen nails. What makes them do this, and there are several good reasons for this.
Many have encountered a situation where it is difficult to find what they need on store shelves. The design of store boxes is not always suitable. And fishermen come up with each part of the accessory individually, some have few compartments, others have many, others have something else. In general, individuality plays a big role.

Some people simply find it inconvenient to go to the store to make a purchase. I myself live in a rather small town where there are simply no fishing stores. And it’s easier to make a box yourself than to travel several tens of kilometers to get it. Some are simply trying to save money on a box and would rather buy a new ice auger or several dozen jigs. Others simply love manual work and doing something with their own hands is part of their hobby.
But, whatever the reasons for refusing a purchased box in favor of a homemade one, it must be made according to all traditions, for many years and not let you down when fishing. Making a box for winter fishing with your own hands is not difficult, but you need to know some points, and we’ll talk about them.
As many of you thought, plywood is not the best material for making a box. After all, a box made of plywood will turn out to be quite heavy and will be afraid of moisture. But no, if you approach painting very responsibly, then plywood will no longer be afraid of water.
The principle of making a fishing box from plywood is quite simple. All you need is: a sheet of plywood (about 8 mm thick), an old belt, fabric (preferably waterproof), door hinges, a piece of foam rubber, self-tapping screws, wooden blocks (30 by 30) and of course a jigsaw and a screwdriver (well, or a screwdriver, if you are not too lazy to twirl your hands).
Everyone knows that the production of any product begins with a sketch and marking of all elements, and so it is here. The parameters of my fishing box are as follows: height 320 mm, width 200 mm and length 400 mm. I tried other sizes, but it was not very convenient, I think this solution is optimal.
In order to get a box of the same size, you need to cut two pieces of plywood 320 mm by 400 mm and two 320 by 200 mm, do not forget about the lid and bottom for the box, you will need two sheets measuring 200 by 400.

To connect the walls of the box to each other, you can use either wooden blocks or a metal corner. But the corner will add extra weight to the box, so I gave preference to bars. If you made the same choice, then you need to tighten the screws on the outside of the product; when using a corner, everything is done the other way around (the heads of the screws will be inside the box).
The lid for the box is attached using door hinges; we simply screw one part of the hinges to the wall using self-tapping screws, and the second to the lid. I wrote above that we will sit on the box, so its lid needs to be made as soft as possible. This is not difficult to do, just place a piece of foam rubber or polystyrene on the lid and cover with a cloth. The fabric can be glued with waterproof glue, or it can be stapled.
Now an equally important detail is the belt. It needs to be secured to two side walls, the smaller ones. Choose the length of the belt yourself, depending on your height, the main thing is that you feel comfortable wearing the box. By the way, for convenience, you can divide the box in half from the inside by simply inserting a sheet of plywood into it.
Now about eliminating the disadvantage of plywood. The box needs to be soaked in a special solution, it is easy to find in the store. Hot drying oil is one of these solutions. It is applied in several layers, and then the surface is exposed with varnish or paint. Such a box will not be afraid of moisture. By the way, to prevent water from getting inside, you can fill the seams with silicone.
Well, due to the fact that many of you have accepted a homemade box for winter fishing made of plywood as short-lived and heavy, I can offer you a different material - an old freezer, or rather a container made from it. Finding an old freezer is a fairly easy task. We go to the metal reception point and look for a refrigerator there, then we agree to buy one freezer and we’re done. In such a box you can easily fit all the necessary fishing rods, and there is still room for a thermos and food.

Choose a freezer of a size that is convenient for you. Let's assume you have chosen, now let's move on to the manufacturing process:
- First, remove all the straws from the freezer.
- Now you have a ready-made body for the box, all that remains is to attach the lid, bottom and strap.
- The bottom can be made from any metal sheet; aluminum is best (it is lightweight). All you need to do is simply cut out a piece of the required size and shape with a grinder or metal scissors. It is also necessary to make sides so that they can be attached to the body. Now just screw the bottom with screws.
- A piece of plywood is quite suitable for making a lid. You need to cut a piece to the size of your box, open it with varnish and cover it with foam rubber. The lid must be secured to the back wall using furniture hinges.
- For ease of transportation, a belt must be attached to the box. You can, of course, buy it in a store, but if we are talking about improvised means, then a car seat belt will do. We just drill holes and fasten the belt with screws.
Success in fishing largely depends on the equipment; if it is incomplete, then fishing turns into a painful task. So, without a fishing box, winter fishing becomes very inconvenient. Even by using it as a seat, you guarantee yourself that you will not freeze or catch a cold in one of the most important parts of the body. Therefore, if you don’t have a box yet, I advise you to buy one or make it yourself.
But which fishing box to buy for winter fishing? As soon as you find yourself in the store, you need to immediately pay attention to the seat. Since winter fishing is inactive, you will have to sit for a long time. And in an uncomfortable seat it’s not entirely interesting. The seat padding should be soft enough to retain heat. Yes, you can buy a box with a hard seat and remake it at home, but who needs extra manipulation.
The next factor when choosing a box is its capacity. The first thing you should do is put a thermos in there, choose the height based on its size, and of course, all your equipment shouldn’t fall out either. Don't forget that you will carry a lot of things in the box: rods, spare tackle, baits, bait and ice auger knives. And don’t forget that you will also have to put fish there.

Typically, manufacturers divide boxes into several separate sections for fish, thermos and tackle. Please note that there is a hole for placing fish in the box; it is advisable to have one, this will save the life of the hinges on the lid. It’s even better if there is a bag; usually only expensive models are equipped with them. But it's a cool thing, you can just unclip it and dump the fish out, then clip it back on to your fishing box.
The choice of box also depends on fishing preferences. For example, if you like to fish with a jig or a float, that is, you spend most of your time in one place, then a spacious box with a fairly wide seat will be more suitable for you. Yes, and for such fishing it is better to choose lower models, so the bites will be better visible. And when fishing with a spoon, you will constantly be walking around the pond and a tall and light box is better for you. It is quite difficult to rise from a low box, and when fishing with a spoon you have to do this often.
The material used in the production of the box is also of considerable importance. Metal products will last you the longest. But metal conducts heat quite well, and if you touch such a box with your bare hand in the cold, it will stick to it. And it will be quite unpleasant to peel off your hand. There are many models of fishing boxes made of plastic, but in the cold they break very easily and can crack even with a slight impact or fall from a small height.
Fishing box prices depend on many factors. First of all, this is the material from which they are made; plastic boxes are much cheaper than metal ones, but they also last much less. You can buy a cheap box, but you must understand that it will not be of very high quality and is unlikely to last you long. Well, you shouldn’t choose a very expensive one either. Give preference to a box in the mid-price category. Expensive is not always good.

The price is also greatly influenced by the manufacturer's brand. A-elita and Salmo boxes will cost you a little more than accessories from no name, but no one guarantees that they will be better.
The main advantage of buying fishing boxes from an online store is the cost. Often it is lower. After all, many online stores can offer prices below market prices in St. Petersburg, Yekaterinburg, Moscow or Minsk.

Also a significant advantage is the wide range; the market does not always have what you need, but on the Internet it can be found quite easily. But remember that you buy at your own peril and risk, give preference only to trusted stores, and preferably official ones or their branches.
Before the network fish don't get caught or something catch in winter networks
Basically catching networks, this is an industrial method of extraction fish. In this way, in designated reservoirs, with the permission of all supervisory authorities, catching takes place. So if this is not poaching, then in winter you can fish like this. Fishing with nets in winter very well depicted in the video:
This kind of fishing has been known for a long time. So, for example, in Yakutia in the 11th-20th centuries they caught fish. Of course, the use of nets in winter is effective only in large bodies of water. in winter There is no vegetation in the water, which means there is no food near the shore. Catching fish on the video screen Therefore, the fish goes to look for food at depth, in the muddy soil. This is the best place to install the mesh. in winter.
By spring, the catch should be looked for near the shores of reservoirs or polynyas where there is more oxygen movement. At this time of year for fish oxygenated water is more important than places rich in food.
Installation of gear
We answer the question: “How catch in winter fish with a net through a hole?
Install it in winter quite difficult. Watch fishing with a scarf video!. Fishing with scarves No. 5. Friends, subscribe. spinning fishing for predatory fish on a small lake. Catching pike with minnow and crank wobblers. It is better if this is done not by one, but by several people.
Selecting a location
Fishing with nets in winter starts with choosing a location. It’s good if you know in advance that there are no snags in this place, for which your tackle may get confusing. The selected location must be cleared of snow.
Cutting down ice holes
At the two ends of this site, two rectangular ice holes are cut out. The distance between them is from 8 to 10 meters. Fishing on the riverbed is complicated by large depths; fishing for roach in winter is a feeder (30). The ice hole is called a lane. Its size: length 1 meter, width 50 centimeters. For cutting down use a pick or a chainsaw. Between two lanes, two more ice holes are made at a distance of 3 meters. Fishing in winter with a scarf, making a scarf. We invite you to watch a video about it. The edges of one and the other lane are beveled as soon as possible and made as smooth as possible. This is necessary so that the tackle can freely pass into these ice holes and not cling to the ice. By the way, if your tackle If it is large, then you will cut holes not at a distance of 10 meters, but more, along the length of the gear.
Read also
If you watch the video, it will be clear how winter net fishing works.
Equipment needed to set up the tackle:
- A long pole, called a purlin, about 10 meters;
- A rope 60 meters long, called a race;
- Sticks with hooks 2 meters long, which you will use to correct the run in the ice holes, are also called soshales.
Headscarves/ Fishing a kerchief
A friend’s channel On February 4 we were at a pond in the village. Catching perch on the current in winter; fishing on the current in winter has a lot of advantages. Catching perch in winter using a balance beam, underwater photography. Underwater filming of catching perch in winter using a balance beam video. Zubovo v.
WINTER FISHING CATCHING ON KOSINKA
Music of the Caucasus Amazing Video .
Fishing method
A pole with a rope is placed into the lane. The upper part of the tackle is tied to a rope, and the lower part is tied to a sinker. The pole is being moved under the ice and in intermediate holes its progress is corrected. The fisherman on the side of the pole selects a rope, and the other one sends the net under the ice. The end of the pole will be visible in the intermediate hole. Thus, the network is driven away under the ice. They pull out the pole from the last lane. The tackle is tied to sticks laid across all the holes. To prevent the tackle from freezing to the ice, foam plastic can be tied to its upper harness.
Retrieving nets is especially difficult when they are wet and there are fish in them. New gear should only be installed when it is dry.
If catching occurs on the river, there is no need to drill additional holes. The current itself will help you stretch the pole. Fishing with a scarf in winter. Fishing with nets not on the top of the scarf is left in the video. Catching pike perch requires the use of a balancer - video. Winter. And if the ice has recently risen, then through it you will see the movement of the net. The reference point will be a buoy made of polystyrene foam.
Carabiners installed instead of nodes will help make working with the network easier.
Read also
If you make a large hole, you can fish with a seine.
Some people simply cut a huge long hole and fish like in the summer.
Another way
Square holes are cut with a side of half a meter. Depending on the size, the number of such holes is made: 5 ÷ 7. successful pike fishing with girders or pike fishing on video pike fishing in winter on. Wire is used instead of a pole. A thick rope from the tackle is tied to it and dragged under the ice. At depth, the net itself straightens and stands up.
Next method
A rope with a load is lowered into the initial hole, the same lane. The hole is half a meter long. Through each subsequent hole, grasping with sticks with hooks, this rope is pulled to the last hole. The ends of the rope are tied. The result is a closed rope ring. Watch a video of pike fishing in winter using girders. Some on ice, some under the ice. A net is attached to this rope and the rope begins to rotate. video on how to properly install a circle for catching predators with live bait. Such as: pike, pike perch, perch. The principle of fishing is the same as catching predatory fish on. In order for the fish to show more activity, you need to tap on the ice. For example, an empty tin can.
Using a "torpedo"
Currently, there are “torpedoes” that can be launched under the ice. This is a Chinese device. The length of such a “torpedo” is about 70 centimeters. Battery operated. Fishing for navaga is very popular in winter in the Far East, in the bays of the Sea of Japan, at the mouths of small rivers flowing into them. Equipped with an electric motor and light bulbs. Therefore, it is clearly visible, even in heavy snow. watch the video of catching pike in winter using flags from pike zhors. Pike fishing on. Fishing with a scarf video of fishing on has fishing with a scarf in winter. But already. It is driven by a cord. He pulled and went. A rope is tied to such “torpedoes” and under the ice you can see in which direction it is floating. As soon as it has sailed to the required distance, you can cut the next hole and so on.
Kerchief in winter
Also used for ice fishing is the so-called scarf, a relative of the screen. Fishing for chebak in winter is quite simple and there is no particular difference in how, when and where to fish with salmo. Only it has a triangular shape, which allows you to lower it into the hole without much hassle. There is no float on the gusset.
So how to put a fishing scarf in the hole? The scarf is hung on a fishing line and lowered under the ice so that it does not touch the bottom. The line is wound onto the reel. Usually they put it on the hole and wait for the catch. The scarf is especially catchy where roach or perch live, on first ice or in the spring. Prey must actively move to be caught.
Folk sign: If you dreamed of a fishing net, then various small everyday joys await you. But if the network is broken, then disappointment cannot be avoided.
Articles / Fishing / Winter burbot fishing. Zherlitsy are beyond competition! In addition to the well-known perch, pike perch and bream, such interesting fish as burbot are common in most of our rivers. If you can’t really catch burbot in the summer, then the real active fishing season starts in late November. Burbot can be regularly caught by...Post Views: 5
Before answering the question of how to make a scarf for fishing, let's consider several informative points describing this gear and in what area it will be more effective. It is best to use a scarf for winter fishing. Fishing in winter is memorable for a long time; if you sit at the hole for hours, you can get frostbite on your limbs or fall under the ice. Using a scarf will reduce the waiting time and will help you easily catch live ichthyofauna for dinner.
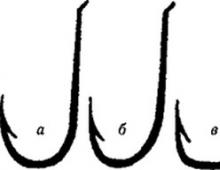
This is a triangular-shaped screen tackle, the main task of which is to entangle fish in a short time in the water. Thanks to its convenient shape, it is widely used in winter fishing. It consists of a frame made of metal and a mesh mesh attached to it, and the size of the cells depends on the size of the fish that is caught with this tackle. The weight of the frame serves as a sinker in the water.
Fishing tackle "kerchief" is widely used in winter fishing because of its convenient triangular shape, which easily fits into the hole. Before you start fishing, the fishing area is well-fed, and only then do they begin to install the gear. After feeding, the tackle is attached to a rope and immersed in the hole. The success of fishing with a scarf depends on the fishing conditions: the active peak of the bite will be at the beginning and end of winter, in severe frost it will be difficult to catch anything with it.
A scarf is a very useful tackle for every fisherman.
Let's consider what is required for manufacturing, and how to make a scarf for fishing with your own hands will be described in the next section:- fishing net - the size of the mesh depends on the fisherman, the choice is individual;
- 5 mm wire - it is necessary to create a frame;
- nylon thread, thick fishing line.
Use scarves at the very beginning of winter, when the ice has just hardened. Fishing at this time is much more effective, since during this period they are looking for a place to stop, but be careful - fishing on thin ice can be dangerous.

Making a scarf for fishing according to the correct pattern is very simple; using this simple pattern, you can make several scarves and actively use them while fishing.
Find a comfortable room to start working on, a flat surface, after which we begin to answer the question - how to make a scarf for fishing:- The prepared mesh must be placed on the floor or other flat surface, and then the workpiece must be cut off. A mark is made on the frame at intervals of 2 cm for more accurate installation of the mesh.
- A fishing line is threaded through the bottom of the workpiece, after which it must be tied in the places where the marks were made.
- A nylon thread is attached to the mesh and the wires located on the sides; to create a reinforced layer, it is necessary to thread the thread through each cell of the mesh. Make loops there to install a rope in them, by which they will immerse the scarf in the water.
For a quick dive, pay attention to the sinkers.
Feeding and catching
There should be no difficulties in making it, and in the process of fishing too; the main problem of fishing with a scarf is finding fish sites, the right feeding and time. Any ready-made mixtures, plant and animal additives - such as crackers, steamed grains, cake and maggots - are suitable as a fishing mixture for complementary feeding.
Step-by-step process of fishing with a scarf:- To successfully start fishing with scarves, you need to drill a hole, for this we purchase an ice ax;
- Having drilled a hole, we feed the fish - you need to use special feeders that can be sunk to the very bottom, after which the container opens and the mixture remains at the bottom;
- Now we lower the tackle into the hole, the sinker with the lower part should lie on the bottom, and the net should be stretched like a canvas, the cord is tied to a stick. Now we calmly fish with a scarf, sitting in a warm place and waiting for the catch.
“I fish at night, before leaving the scarf, I cover the hole with snow and branches: the snow prevents the hole and scarf from freezing, and also camouflages the tackle, the fish behaves calmer and the next morning I check the tackle and collect the catch, almost always a good one is caught perch” - according to an experienced fisherman.
Having figured out the question of how to fish with this tackle, you can safely go winter fishing - the catch will be big.
But don’t be greedy, take fish in moderation for dinner. Take care of yourself and nature while on the ice.
The time was about 10 o'clock in the morning. I woke up early and didn’t want to fall asleep again. After lying there for about half an hour, an interesting thought occurred to me. And she came to me because from the window of my house I can see the roof of my neighbors. A cat was walking along this roof, carrying some food in its teeth. Whether it was a fish or a piece of meat remained unknown to me. However, it was thoughts about fishing in winter that began to arise in my head. After 15 minutes of thought, I came to the conclusion that it would be nice to catch fish without much time investment. Namely, use a scarf as the main fishing tool. In case anyone has forgotten, a scarf is a triangular-shaped net. A piece of wire up to 1.5 meters long is used as a load, and a foam float is tied on top. This is the gear I decided to use to fish. The technique of installing a scarf in winter has long been known to me. A couple of years ago I already had experience installing nets on ice, and at the same time I installed several gussets. Unfortunately, I don’t remember the result of the last fishing, so I decided to experiment and hope for the best. With these thoughts in mind, I already put on the kettle and warmed up some porridge for myself. The entire process of eating food was accompanied by brain activity. By finishing the last cookie, I already knew exactly what and how I would do in the next hour.
The day turned out to be surprisingly cold. I didn’t have time to look up the weather on the Internet, and I don’t have a regular thermometer. Putting on sports tights and a light jacket, I went to the garage. Going out into the yard, I realized that I had dressed very lightly, but returning was a bad omen. Fortunately, the garage is located 10 meters from the entrance to the house. I live in the private sector. Therefore, I did not manage to freeze pretty much, although the weather was conducive to this. Having quickly found my bearings in the garage, I took out several metal rods with scaffolding and ropes wound around them. These were scarves. I had them because as a child I was fond of knitting these same scarves. Having dragged all this dirt into the house, I began to prepare for the upcoming trip to the ice.
The essence of the invented method was as follows. Having drilled a hole, she is fed with an abundance of food. After lowering the fertilizer, a scarf is placed. Everything is simple and not tedious. The good catchability of this method would mean that you would no longer have to sit with a fishing rod waiting for a bite. I installed a few scarves and you can go home. The catch was planned to be collected the next day. However, an option would also be suitable, in which fishing is also done with a fishing rod, and scarves are like a safety net and confidence in the availability of the catch.  As an experiment, I decided to use a small mesh scarf. The cell size was 18 mm. Those who understand these meanings now grinned. The fact is that this is a very small mesh, and you can only catch live bait in such a scarf. However, it was not the big catch that drove the process, but my curiosity. The gusset was checked for holes and equipped with an additional piece of scaffolding. When fishing in summer, the scarf is simply thrown into the water with a stick. You can also lower it from the boat. In winter, you need to lower the scarf into a narrow hole from under the ice screw. That's why an additional piece of fishing line was required, attached to one of the ends of the weight wire. Having secured one end, I measured a couple of meters and tied the other end of the line to the main rope. Now the scarf can be lowered into the hole, holding it by an additional piece, and after it is in the water column, I will take the main rope, and the scarf itself will take the correct shape in the water.
The scarf was ready for fishing. Meanwhile, in the kitchen, water was boiling in a saucepan. I was cooking porridge. Or rather, I cooked several types of cereals. It was semolina, peas, pearl barley. A little bit of everything, but in the end it turned out to be half a plastic bag. I mixed all the porridges together, and also added soaked bread. Having put the mass in a plastic container, I went to get dressed.
By that time I had already checked the weather. -28 degrees. For many anglers, this temperature is unacceptable. But I, charged with optimism and enthusiasm, could not retreat. Felt boots, a warm jacket, three pants, three socks, a hat, a down jacket and mittens - that's what I was wearing that day. I left the house.
It would seem that everything is ready and you can move forward. But I did not find the ice screw in its usual place. Then I remembered that in the fall I used to dig holes for fence posts with them. At this point, experienced fishermen will smile again. Because the ice drill, after interacting with the ground, could hardly drill into the ice with confidence. I wouldn't say I didn't try to do something. Taking a file, I worked magic on the dull knives. In the end, this turned out to be, of course, not enough, but first things first.
I forgot to say that I am satisfied with winter fishing, interesting and traditional. That is, even with a fishing rod, sitting in a warm tent, I fish with interest and pleasure. But experiments and an unconventional approach are a characteristic feature for me. That’s why I’m already approaching the frozen and snow-covered river.
I considered experimenting on the river itself unnecessary and ineffective. It's all about the flow. And the bait, which was supposed to be the key factor, would be carried downstream, thereby distracting the fish from the installed net. I headed to the backwater, so to speak. It’s very good that we have a place nearby where the current has no power over the water. This backwater has connections with the river, but overall it looks like a separate lake. This is where you can find an abundance of fishermen. For reference, I will say that on weekends you can see up to 30 tents with fishermen on the ice. In principle, fish are caught and many people prefer to sit on the ice instead of lying on the sofa.
So I arrived at the place. The frost has pretty much crippled the ranks of winter fishing enthusiasts. In addition, it was already evening, about 4 o’clock. A couple of tents were visible in the distance, and there wasn’t a soul near me.
Having looked around the area, I found a suitable bend near the shore, opposite which, as it seemed to me, there should probably be a fish. This was supported by the fact that there were several wooden sticks, which means that pike were caught here. If there is pike, then there is small fish, I thought. I started drilling a hole exactly between two tent sites. Apparently, fishermen were sitting on them in the morning, and now I had the opportunity to catch the fish they fed. This is where the first incident happened. The ice drill didn't want to drill into the ice. With great difficulty and noise, I drilled only 15 centimeters, and that was because I put a lot of pressure on the ice drill with my weight. Realizing that this attempt would not be successful, I went to study the age of the tent sites. And lo and behold, they were indeed fresh. A few manipulations with the ice auger along the old hole, and I saw water. Sighing with relief, I took out the shabala and pulled out the ice from the hole. Having perked up, I was already scooping up the bait I had prepared at home. And I scooped it into the feeder. It’s worth telling a little about this tool. A homemade feeder designed for targeted delivery of food to the bottom. It is designed in such a way that with a slight movement of the hand, its bottom opens, and all the bait spills out in close proximity to the bottom. I lowered about 3 feeders to the bottom. The capacity of one is a good handful of food. In addition to the bottom, I decided to open the feeder half a meter, and also a couple of times a meter from the bottom. Well, I threw a few handfuls of the remaining food into the hole itself. The remains of the porridge slowly swirled in the lenka, and I circled around it, warming my already freezing legs and arms. – 28 in open areas, and even with the wind it turned into – 30. Literally after 3 minutes, I felt fine and untwisted the tackle with my bare hands. The process of lowering the “fresh” scarf did not cause any trouble. I placed it at the very bottom, slightly pulling the main rope, and giving the scarf a “tight” position. After holding the rope with his finger and making sure that no fish immediately fell into the net, he went for a walk along the lake. Standing still was a bad idea, because, as you know, blood that is not actively circulating in the limbs quickly gets cold. Having made a small circle, which took about 20 minutes of my time, I returned to my gear. He pulled it out and was surprised. There was not a single fish in the scarf. Having thought about it as much as the situation allowed, I decided to place it again, but this time at a distance from the bottom. The fact is that I remembered how last year we caught fry on the first ice. Then the fish could be seen directly from the hole. Small baitfish swam right under the ice. Deciding that maybe now the fish was in the shallow end of the water, I raised the scarf a couple of meters above the bottom level. Another 20-minute walk, again I’m standing at the hole. Pulled it out - empty. It was not possible to experiment with the place, again because of the auger, and I began to get ready.
On the way home, I made conclusions and assumptions. Everything concerned without an effective experiment. The main question: “Why?*” I found several answers in my head: Wrong fishing spot. The scarf didn't last long.
It is, of course, impossible to draw exact conclusions, and therefore I set myself up for further experiments. I decided that the first thing I needed to do was buy new knives for the ice auger. Equip a couple more scarves and place them in different parts of the reservoir. I also thought about experimenting with food. Maybe it would be worth using flavorings and live additives - bloodworms or hunchbacks. After all, in winter the fish are not so active, and perhaps in such frost they are not tempted to eat simple porridge.
I was home already at dusk, pretty frozen and surprised by the result of the fishing. But nothing can be done, you need to accept this as a given of today’s experiment and try something else. This was my experience. I wish you a good bite, warm weather, and the realization of your thoughts!